MiAC2100IPv6

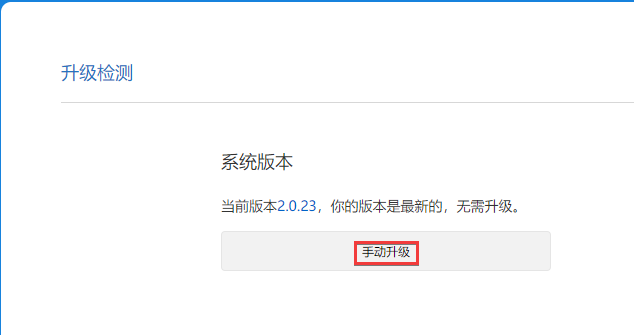
1. 升级/降级至官方固件版本: 2.0.23 稳定版。操作入口在路由器常用设置-系统状态-升级检测处。
2. 开启SSH
2.1 方法一
- 登录到路由器后台,输入密码进入。
- 复制路径中的stok,然后执行。将其中的
和 替换为自己的值。 1
2
3
4
5# 开启ssh
http://192.168.31.1/cgi-bin/luci/;stok=<STOK>/api/misystem/set_config_iotdev?bssid=Xiaomi&user_id=longdike&ssid=-h%3B%20nvram%20set%20ssh_en%3D1%3B%20nvram%20commit%3B%20sed%20-i%20's%2Fchannel%3D.*%2Fchannel%3D%5C%22debug%5C%22%2Fg'%20%2Fetc%2Finit.d%2Fdropbear%3B%20%2Fetc%2Finit.d%2Fdropbear%20start%3B
# 修改密码
http://192.168.31.1/cgi-bin/luci/;stok=<STOK>/api/misystem/set_config_iotdev?bssid=gallifrey&user_id=doctor&ssid=-h%0Aecho%20-e%20%27<PASSWORD>%5Cn<PASSWORD>%27%20%7C%20passwd%20root%0A
2.2 方法二
- 登录到路由器后台,输入密码进入。
- 打开f12,直接运行以下代码。输入密码后,即可开启ssh。
1
2
3
4
5
6
7
8
9
10
11
12
13
14
15
16
17
18
19
20
21
22
23
24
25
26
27
28
29
30
31
32
33
34
35
36
37
38
39
40
41
42
43
44
45
46function getSTOK() {
let match = location.href.match(/;stok=(.*?)\//);
if (!match) {
return null;
}
return match[1];
}
function execute(stok, command) {
command = encodeURIComponent(command);
let path = `/cgi-bin/luci/;stok=${stok}/api/misystem/set_config_iotdev?bssid=SteelyWing&user_id=SteelyWing&ssid=-h%0A${command}%0A`;
console.log(path);
return fetch(new Request(location.origin + path));
}
function enableSSH() {
stok = getSTOK();
if (!stok) {
console.error('stok not found in URL');
return;
}
console.log(`stok = "${stok}"`);
password = prompt('Input new SSH password');
if (!password) {
console.error('You must input password');
return;
}
execute(stok,
`
nvram set ssh_en=1
nvram commit
sed -i 's/channel=.*/channel=\\"debug\\"/g' /etc/init.d/dropbear
/etc/init.d/dropbear start
`
)
.then((response) => response.text())
.then((text) => console.log(text));
console.log('New SSH password: ' + password);
execute(stok, `echo -e "${password}\\n${password}" | passwd root`)
.then((response) => response.text())
.then((text) => console.log(text));
}
enableSSH();
3. 取消IPV6拦截
3.1 方法一
运行脚本,脚本内容为
1 | ip6tables -F |
3.2 方法二
- 使用 Vim 修改防火墙配置文件:
1
vim /etc/config/firewall
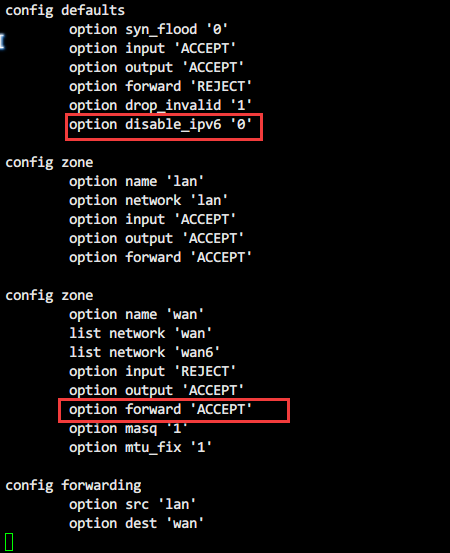
- 将文件中defaults 闭包下 disable_ipv6 的值改为 0,zone 闭包下 forward 的值改为 ACCEPT。
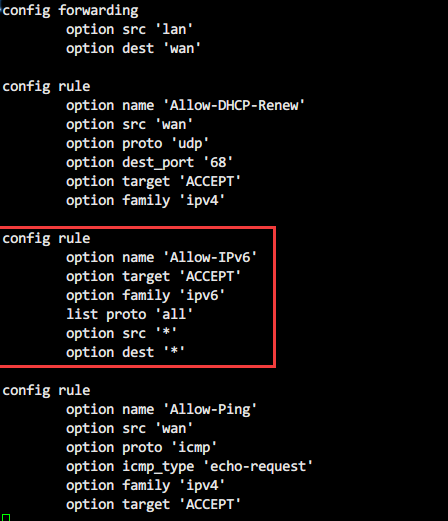
- 在原有的Rule 中添加一个闭包,允许IPv6外网访问路由器下游设备。
1
2
3
4
5
6
7config rule
option name 'Allow-IPv6'
option target 'ACCEPT'
option family 'ipv6'
list proto 'all'
option src '*'
option dest '*' - 终端执行命令,重启路由器防火墙。
1
/etc/init.d/firewall restart
4. 开启IPV6
进入路由器后台常用设置——上网设置——最底部IPv6设置,打开上方开关,上网方式修改为Native。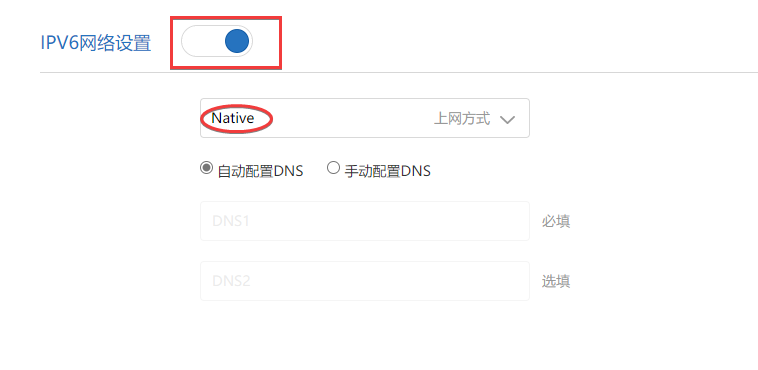
参考
- Title: MiAC2100IPv6
- Author: Ethereal
- Created at: 2023-08-12 16:00:46
- Updated at: 2023-10-13 16:35:55
- Link: https://ethereal-o.github.io/2023/08/12/MiAC2100IPv6/
- License: This work is licensed under CC BY-NC-SA 4.0.
Comments